Encountering the “VAC was unable to verify your game session” error can disrupt your Counter Strike 2 gaming experience, barring access to the game’s full functionalities. This guide is dedicated to resolving this issue, offering clear, easy-to-follow solutions. Whether you’re a seasoned player or new to the game, these fixes are designed to get you back into action without unnecessary hassle.
Fix 1: Verify CS2 Game File Integrity
One of the primary causes of the “VAC was unable to verify your game session” error in Counter Strike 2 is corrupt or missing game files. Steam offers a built-in feature to check and rectify such issues. Here’s how you can use it:
- Open Steam Launcher: Start by opening your Steam client. Ensure you’re logged into your account where CS2 is installed.
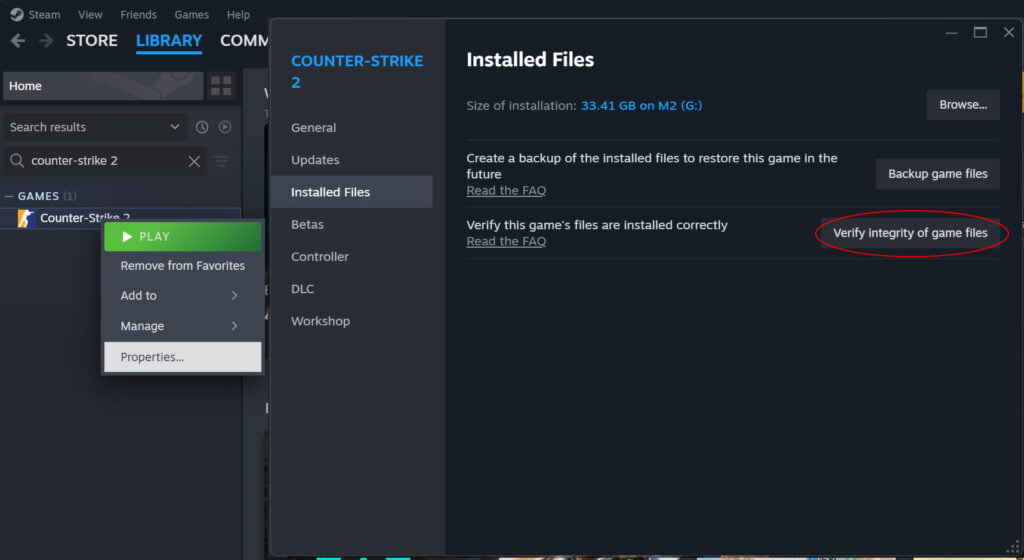
- Access CS2 Properties: Navigate to your Library, find Counter Strike 2, right-click on the game, and select ‘Properties’.
- Verify Integrity of Game Files: In the Properties window, click on the ‘Installed Files’ tab, and then select ‘Verify Integrity of Game Files’. Steam will start scanning your game files, comparing them with the latest version available on its servers. If any discrepancies or corruptions are found, Steam will automatically download and replace the files.
- End Steam Processes: After the verification process, close the Steam client. Then, open your Task Manager (Ctrl+Shift+Esc), head to the ‘Details’ tab, and terminate all processes related to Steam. This ensures that no Steam process interferes with the game launch.
- Re-launch Steam and CS2: Finally, re-open Steam and launch Counter Strike 2. In many cases, this step alone resolves the VAC verification issue.
By verifying the integrity of the game files, you’re ensuring that your game is up-to-date and free from any file corruption that could be causing the VAC error. If this step doesn’t resolve the issue, proceed to the next fix.
Fix 2: Launch CS2 as Administrator
If verifying the game files doesn’t solve the issue, the next step is to ensure that Counter Strike 2 has the necessary permissions to run properly on your system. Running the game as an administrator can resolve potential permission conflicts that might be causing the VAC error. Here’s how to set CS2 to run as an administrator:
- Access CS2 Properties via Steam: Open your Steam client, go to your Library, right-click on Counter Strike 2, and choose ‘Properties’.
- Navigate to Local Files: In the Properties window, click on the ‘Installed Files’ tab and then select ‘Browse’. This will open the folder where CS2 is installed on your computer.
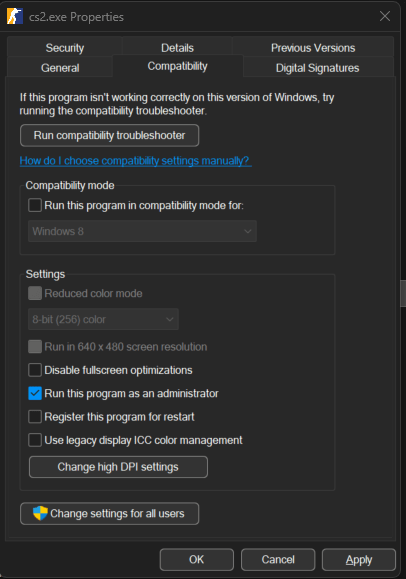
- Locate and Modify CS2 Executable: In the CS2 folder, navigate further into ‘game/bin/win64’ (this path can slightly vary depending on your computer) and find the ‘cs2.exe’ file, right-click on it, and select ‘Properties’.
- Set to Run as Administrator: In the Properties window, switch to the ‘Compatibility’ tab. Check the box next to ‘Run this program as an administrator’. Click ‘Apply’ and then ‘OK’ to save the changes.
Running CS2 with administrative privileges ensures that it has full access to all necessary files and services on your system, potentially resolving the VAC verification issue.
If the problem persists after applying this fix, move on to the next solution, which involves adjusting the launch options for CS2.
Fix 3: Removing All Launch Options
Incorrect or conflicting launch options in your Counter Strike 2 settings can sometimes trigger the “VAC was unable to verify your game session” error. Simplifying these options can often resolve the issue. Follow these steps to clear your launch options:
- Access Game Properties: Open your Steam client, navigate to your Library, right-click on Counter Strike 2, and select ‘Properties’.
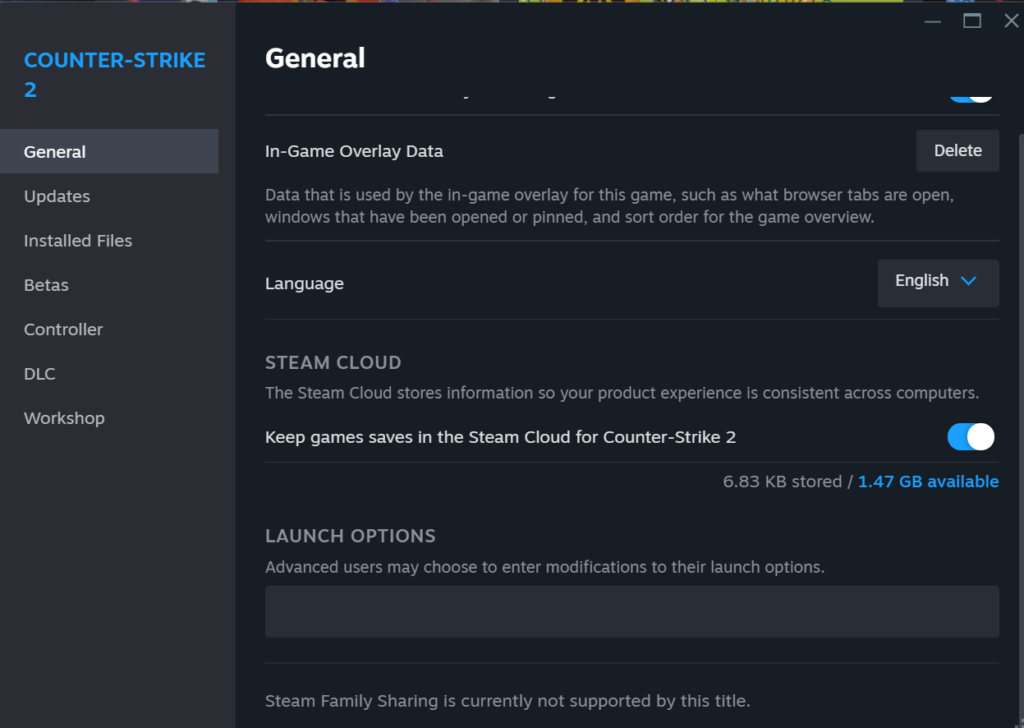
- Locate Launch Options: In the Properties window, click on the ‘General’ tab. Here, you’ll find the ‘Launch Options’ section.
- Clear Launch Options: Remove any text present in the ‘Launch Options’ box. This will reset your game to use default settings, eliminating any potential conflicts or issues caused by custom launch options.
After clearing the launch options, restart Counter Strike 2 through your Steam library (not from a desktop shortcut) to ensure that it launches with the default settings. This can help in resolving the VAC error by eliminating any incorrect settings that might have been interfering with the game’s operation.
If, after trying this fix, the issue still persists, consider the additional fixes mentioned in the next section of the article.
Additional Fixes
If the aforementioned solutions don’t resolve the “VAC was unable to verify your game session” error, consider these additional fixes:
- Reinstall Counter Strike 2: Sometimes, a fresh installation can resolve underlying issues. Uninstall CS2 from your Steam library, then reinstall it. This ensures that you have the most recent version of the game with all necessary updates.
- Update GPU Drivers: Outdated graphics drivers can sometimes lead to compatibility issues with games. Ensure that your GPU drivers are up-to-date by visiting the website of your graphics card manufacturer (NVIDIA, AMD, or Intel) and downloading the latest drivers.
While these steps are more general, they are proven to resolve a wide range of issues, including the VAC verification error.
Frequently Asked Questions
Why does the ‘VAC was unable to verify your game session’ error occur?
This error typically occurs due to corrupted game files, insufficient permissions, or incorrect settings. It indicates that Valve’s anti-cheat system is unable to verify your gaming session.
Can this error lead to a VAC ban?
No, this error is a client-side issue and does not indicate cheating or any behavior that would warrant a VAC ban. However, resolving the issue promptly is important to ensure a smooth gaming experience.
How long does it take to verify the integrity of game files?
The time can vary based on your system’s performance and the size of the game files. Generally, it can take anywhere from a few minutes to half an hour.
What should I do if none of the fixes work?
If you’ve tried all the fixes and the error persists, consider reaching out to Steam Support for further assistance. They can provide more personalized troubleshooting based on your specific issue and system configuration.